Tools needed for installation: Screwdriver, Pliers or 11/32 Wrench and Drill (drill bit is included with package).
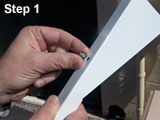
1. Insert the side of the bushing that has a raised lip around the hole on the long, flat side of the flag.
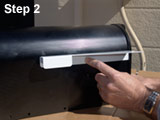
2. During this step make sure that the mailbox door is firmly closed and be careful not to drop the bushing. The flag must be placed on the top of the left flat side of the box as you face the mailbox door and immediately below where the mailbox begins to arch. Making sure that the mailbox door is completely closed, insert the flag tip under the lip of the door and push the flag as far forward as possible. The flag should be parallel to the bottom edge of the mailbox, and the bushing should be between the flag and the box.
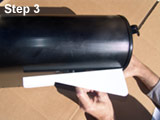
3. Firmly holding the flag in this position, insert the enclosed drill bit through the predrilled hole in the flag and the bushing. Now drill a hole into the mailbox.
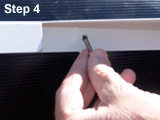
4. Insert the enclosed #8-32 bolt through the flag, bushing and then the mailbox. Open the mailbox door and secure the flag in place by tightening the enclosed 8x32 lock nut onto the enclosed bolt inside the mailbox.
|